Photoshop 3D beginners Tutorial (Part 3)
Photoshop 3D Beginners tutorial (Part 3)
This post follows on from Photoshop 3D beginners tutorial (Part one) and Photoshop 3D beginners tutorial (Part two) . We will start with the object created previously and I will be assuming that you are familiar with Photoshop outside of the 3D environment.
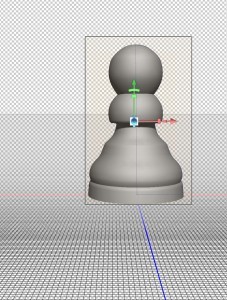
Here’s the image as we left it at the end of Part 2:
The object is resting on the ground plane at the intersection of x and z axes. If your object does not look like this you can reset it via the co-ordinates pallet as described in the previous blog.
Firstly let’s look at moving around within the 3D environment. This is very different from moving the object, which is what you were doing in the last post. You will be using the same move tools found at the top of the page when in Photoshop’s 3D mode. They will only be visible when the move tool is selected in the tools pallet on the left hand side of the screen. You will also notice that the object stays on the ground plane at the intersection of the x and z axes and that the shadow always falls on the same area of the ground plane. You will just be changing the viewing position. The light source object and ground plane remain fixed in relation to each other.
To move around the 3D environment you need to de-select the object. To do this make sure the move tool is selected and click anywhere outside the object. The box will disappear from around the object and there will be minor changes to the move tool options:
The far right hand move option now appears as a camera icon. We will come back to this later.
Rotate Camera Option
The rotate camera option is found on the far left hand side:
Click and drag on the background to get a feel for this. It allows you to move freely and look at the object from any angle. You may think this is all you need when first trying it, but there are several things you cannot do:
1.You will notice that the horizon line stays at the same angle, which is set as horizontal in this case.
2.You cannot go closer or further away from the object.
3.You are always looking directly at the object.
Roll Camera Option.
Moving to the next option along you access the roll camera option:
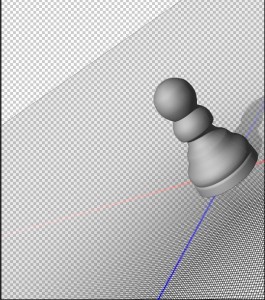
Imagine you are holding a camera and you tilt it at an angle. This is the effect of the Roll Camera option. Click and drag and you will notice the horizon change angle. Here’s the effect of using the Roll Camera option:
Pan Camera Option.
Moving along, the next option is Pan camera:
Imagine you are moving the camera on a plane parallel to your monitor when using this option. This is the plane defined by the x and y axes. You can therefore move up, down, left and right.
Slide Camera Option.
Now lets look at the Slide Camera option:
Imagine you are moving the camera on a plane perpendicular to the monitor, or parallel to the ground plane. This is the plane defined by the x and z axes. You can therefore move left, right, closer and further away. You may find this tool particularly useful when needing to look at close up details or zooming out to view the whole scene.
Zoom Camera Option.
This is the option on the far right and has a different icon to when moving a selected object.
This is fairly self explanatory as it has the effect of zooming in on an object. It is similar to the slide option, but does not allow left and right movement.
The three blogs so far should have given you a good understanding of how to create a 3D object with rotational symmetry, how to move that object around and how to view it from any angle.
Working with multiple objects.
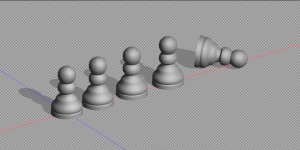
You are now going to look at creating a scene such as the one below:
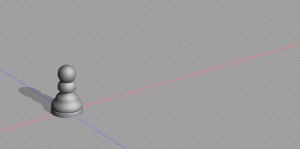
To Start, increase your canvas size to allow extra space to the right where you are going to put the duplicate objects and change your viewing angle to something more pleasing if you wish. Increasing canvas size is done in the same way as when working in normal two dimensional mode.
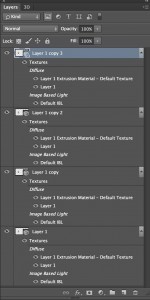
Now make three copies of your layer so you have four objects in total. This is done in the same way you would duplicate a layer when working normally in Photoshop, i.e. Layer>Duplicate Layer or the Mac shortcut Cmd⌘ and J keys. Your layers pallet should now look like this:
What you have here is not only four identical objects, but also four identical backgrounds and four identical light sources. Each layer acts independently, which means the objects will only cast shadows on the background and not on each other. Also the objects take up the same space so they will appear as one object at the moment. What you want is four objects moved to different locations on one background with one light source.
Logically you would think that you could position the four objects where you want them to be, merge the layers and the job would be done. that’s how you would work with two dimensional objects normally in Photoshop. There are several problems with this when working in 3D: Firstly your layers may have different light sources and the ground plane may be viewed from different angles meaning Photoshop has to choose which ground plane and which light source to choose; secondly, as in this case, even when the backgrounds and light sources match exactly Photoshop doesn’t place the objects accurately; lastly you will lose a lot of 3D data if you merge layers via the standard Layer>Merge Layers command.
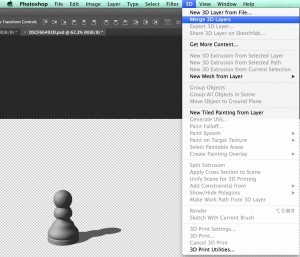
Here’s the easiest way of combining these layers and positioning them. Shift select all four layers in the layers pallet and merge the layers by going to 3D>Merge 3D Layers:
I’m working in Photoshop cc 2014 here, but pre cc versions of Photoshop only allow you to merge two layers at a time. This means you will need to work in stages until you have just one layer in the layers pallet. You now have four objects that appear to be one, as they are directly on top of each other. There is only one ground plane and one light source.
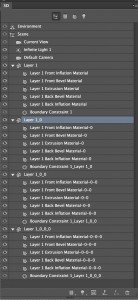
Now look at the 3D Pallet. The four objects can be seen and manipulated here.
The four objects are labelled Layer 1, Layer 1_0, Layer 1_0_0 and Layer 1_0_0_0. A closer look at the co-ordinates area of the properties pallet may show that all four objects are not aligned on the ground plane and at the intersection of the x and z axes. I’m not sure why this should be, but Photoshop seems to shift things around in the merging of layers. I like to reset all the co-ordinates and move the objects onto the ground plane to start with.
I want to leave the original, which is labelled “Layer 1”, in it’s original position. The image of the 3D pallet above shows Layer 1_0 selected. This object can now be moved using one of the methods described in the previous blog. If you want even spacing between objects, typing in coordinates may be the easiest method. I used the move tool options to lay a pawn on it’s side. Also useful was the “Move to Ground” option in the co-ordinates tab on the properties pallet and the use of the secondary view window. If the secondary view window isn’t visible you can open it by going to View>Show>3D Secondary View.
You should now have the knowledge to create a scene with several objects. My example uses duplicate objects, but you can make several different objects using the methods described to make up a scene of your own.


