
The art of choosing good photo retouching samples.
The art of choosing good photo retouching samples
There is a definite art in choosing good photo retouching samples. Making the right choice lessens the retoucher’s workload, whereas the wrong choice can mean hours of unnecessary work with less than ideal results at the end of it. Light direction and quality need to be taken into consideration as well as viewing angle, perspective and sometimes reflective qualities. Experimenting with a certain amount of trial and error can be beneficial. This is where a Photoshop file with well labelled paths and layers can allow you to quickly try different retouching samples.
My Downloadable Skies for retouching help with both direction and quality of light. Having a large selection of viable skies will help you to choose which ones suit or enhance the composition of the shot.
I recently took a series of clear blue skies, available on my ““Buy Images”” tab through July 2015. Interesting cloud formations and sunsets are often good images before even being added to a shot, but sometimes it’s the less obvious skies that sit just right in some shots. So here are a few ideas on how I may use some of these skies in my retouching.
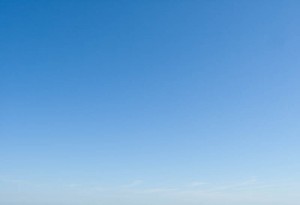
First example is this plain blue sky:
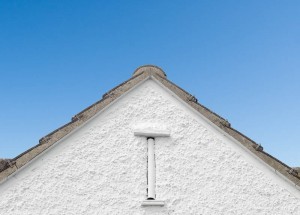
This is a north facing sky taken on a summer morning. The sun is roughly behind the camera, which gives an even tone left to right. Technically speaking this sky should be used on a shot that has the sun on it. Compositionally I would use it on a shot that has simple shapes that may look too busy with the addition of clouds, such as the shot below:
There is a certain amount of personal preference involved. You may choose to have a few clouds in this shot, but the idea of keeping the shot simple makes it stronger in my opinion.
Where there is a large area to fill you may choose to add a sky with clouds to add interest:
The large cloud at the top of this image fills what would otherwise be an empty space and the smaller clouds roughly follow the line of houses, thus enhancing the overall composition.
Now for the exception that breaks the rule – below is the same image in the same format with a clear blue sky:
As a retoucher it is useful to work as part of a team with Photographers and design agencies. If a shot is needed for a magazine cover or as part of a page layout other compositional elements need to be taken into consideration.
Note how the above image has the front of the building in shadow indicating that the sun is on the left hand side. The added sky was taken in the morning, facing south east with the sun also just off to the left indicated by a lighter shade on this side.
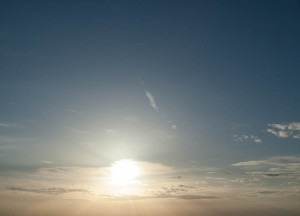
Now for the hidden gem in your arsenal of retouching sky samples, the one taken into the sun:
The reason this may be such a useful retouching sample is because it’s often the shots taken facing the sun that need rescuing. The choice is to either expose for the sky and have the subject matter in deep shadow, or expose for the subject and have the sky completely burnt out. My rule for adding skies to this type of shot is to not make the sky perfect as this will look unrealistic.
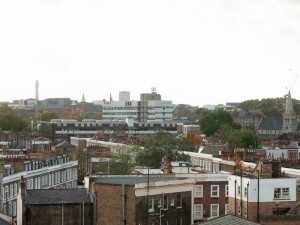
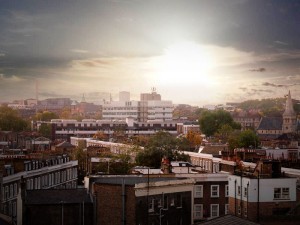
Here’s a cityscape image taken into the sun:
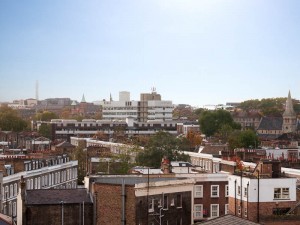
There’s no detail in the sky here. Also if you look on the horizon you will notice how much it lightens, as is usually the case when shooting into the sun. A strong blue sky will look wrong with the most noticeable problem being where the sky meets the horizon. Adding a sky which is already burnt out makes the retouching more believable. In the example below I’ve used my clear blue sky facing the sun and burnt out the highlights even further with a levels adjustment:
Other uses for a burnt out sky may be when retouching interior shots. If there is a window view it is common for the exterior daylight to be brighter than the internal lighting depending on how sunny the day is and what photographic lighting is used.
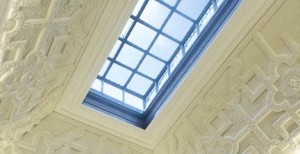
Below is a section taken from a retouched image to show a bright sky added to a skylight:
Again a stronger sky would look out of place here. Also it’s surprisingly difficult to make a darker sky fit by lightening it. Particularly it is difficult to artificially achieve the natural graduation seen in the above example.
I’d like to backtrack now and take another look at my cityscape image. As already mentioned it’s usual for the horizon to look lighter, having a hazy feel to it, specifically when the sun is at a low angle catching atmospheric particles. This is a problem as it restricts the type of sky that can be added. It is also an advantage as haze can add depth and atmosphere to a shot. The sky used on this occasion is an evening shot taken as the sun goes down:
Neither this sky image or the original cityscape strike me as prizewinners, but when added together the final result is more than the sum of the parts:
The underlying message when adding skies, or doing any type of compositional retouching, is to keep focused on the final result. I’m often tempted to add skies that look fantastic on their own. Sometimes they work well, but they can also be detrimental to the final result.
I hope you have found this blog useful. If you have any thoughts on how to use sky samples in retouching please feel free to share them in the comments box.





Choosing an effective photo retouching samples or services involves choosing images that showcase a diverse range of editing techniques, such as skin retouching, color correction, and background manipulation. Aim for images with varying levels of complexity to demonstrate the versatility of your skills.