Creating a Black and white Landscape from a Smart Phone Original
Creating a black and white Landscape from smart phone originals
This blog was originally meant to be about how to make good black and white conversions in Photoshop. I’m not a professional photographer, so my first task was to find a useable, professional quality image that I had permission to use and that would look good in black and white. After trawling through several options there was nothing that really grabbed me.
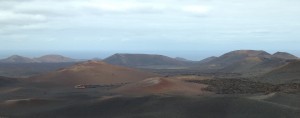
I resorted to recent holiday shots I took on an iPhone and found an interesting shot of Lanzarote taken through the coach window. I am more used to working with images taken on medium and large format backs at very high resolution and so was not expecting any great results.
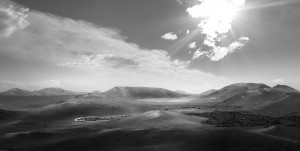
After playing a while with the image I decided to pull in a more interesting sky shot by the missus on her Samsung Galaxy S3. She’s got this thing about shooting into the sun and I decided to use this strong light source to create some more interest in the shading of the picture. I love to work in this way with Photoshop. It allows a gradual build up layers, creating highlights and shadows to add a bit more drama. It’s also great fun!
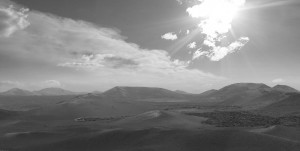
Here’s the final result.
So I will briefly discuss how I make black and white conversions and my thought process when doing so. I will also discuss the various ideas and techniques I use in shading the image. These will be more in the form of general guidelines as a more detailed descriptions would be like a painter explaining each individual brush stroke.
I hope you get some useful ideas from this blog and have as much fun as I did in creating this image.
The Process
Here’s my starting image.
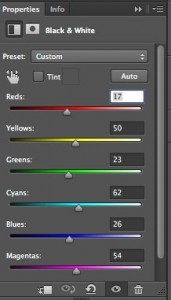
The first step is to get a useable black and white conversion. I have used an adjustment layer to achieve this, deliberately going for a flat look as I want to add my own shadows and highlights. Here’s the setting I used in the black and white options.
The list of colours represents the colours from the original image. The numbers and sliders show how light or dark that colour will be in the conversion. For example to convert the reds into a light grey the red slider needs to be moved to the right, and to the left to convert to a darker grey. this is the same idea as using colour filters when shooting on black and white film.
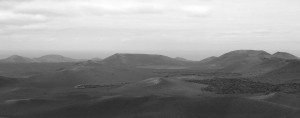
Here’s how the image looks with the adjustments shown.
There’s not a huge range of colours in this image, so getting contrast via a black and white conversion is a bit tricky. Taking yellow areas lighter in the conversion and red areas darker was one option, but I chose to be a bit more creative and manually paint in shadows and highlights, giving me a lot more flexibility and I believe giving a better end result.
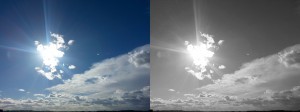
First to bring in a more definite light source. Here’s the sky image I’m going to put in showing the black and white conversion.
I have made a selection of the sky on the original image using the magic wand tool, brought in the new sky, applied a mask and flipped the sky on the horizontal axis. You need to unlink the sky from the mask to avoid flipping the mask too.
here’s the composite image now.
Next I will add light and shade using two types of adjustment layer, Curves and levels. In addition to this I will use a dodge and burn layer. This is done by creating a new layer in the layers pallet. The shortcut for this is Shift, ⌘ Cmd and N keys if you’re on a Mac. Fill the layer completely with 50% grey and change it’s blending mode to “Overlay”. Painting black on this layer will make the image darker and white will make it lighter. I set my brush opacity to a maximum of 10%, otherwise the effect will be too harsh.
When making these adjustments I keep several things in mind.
Firstly the direction of the light from top right hand side to bottom left.
Secondly picking out and defining certain areas such as the curved road, individual sand dunes and a stronger horizon.
Lastly, more general shading over larger areas of the picture. In general the blacks get stronger as they get closer to the foreground and I have used a curves layer to darken the edges of the image making the more central light areas pop out more.
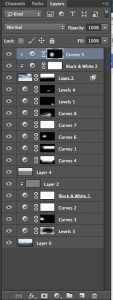
Here’s the Layers pallet showing all the layers used in this image. I tend to use a lot of layers when gradually shading areas, as it is very easy to backtrack and experiment with ideas. If any new ideas are not working you can just trash the relevant layer.
It is worth noting I have kept all layers here, including the original black and white conversion layers, keeping the whole image editable at all times.
For a direct comparison here’s side by side images showing different stages.


