
Creating Photoshop Reflections.
Creating Photoshop reflections in water.
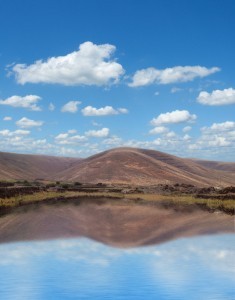
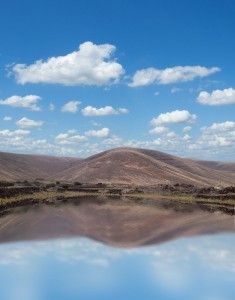
In this post I will be showing you how to create realistic Photoshop reflections, as shown below.
As you can see I have also added a sky. I will not be discussing this as I have covered how to do this in a previous post.
What you will learn is two separate methods for creating Photoshop reflections: first, using filters and second, using an “Overlay” layer with a texture added to it.
Starting Point
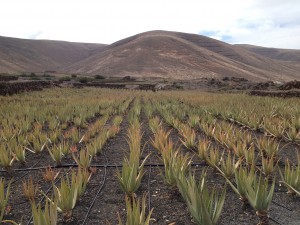
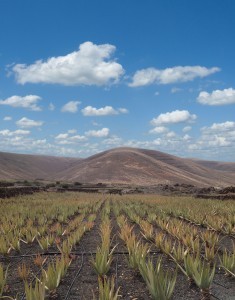
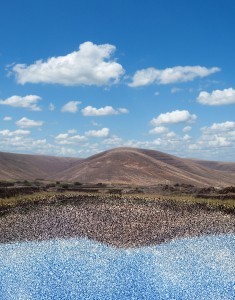
Here’s the image with sky already added:
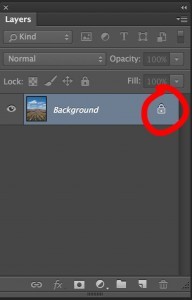
The first step is to make sure your background layer is unlocked. This will allow you to add a layer mask and hide the foreground areas. If the background layer is locked you will see a padlock next to the Background layer in the layers pallet as shown.
If you double click on the word “Background” then click “OK” in the box that appears you will have an unlocked layer which by default is now called “Layer 0”.
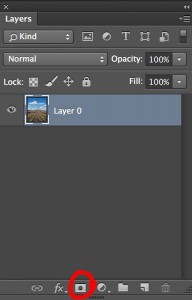
Apply a layer mask by clicking in the area shown:
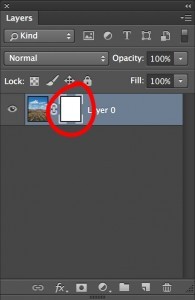
You will now have a layer mask icon appear on Layer 0:
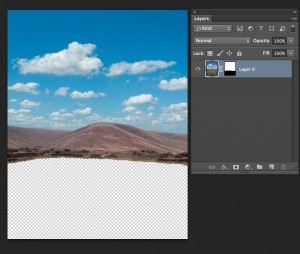
With a large black brush paint on the areas you want to hide. Reduce the brush size when you want to be more accurate. If you make any mistakes you can reveal hidden areas by painting white. You should end up with the following results:
Press ⌘Cmd and J keys if you are on a mac. If you’re on Windows the Control key replaces the ⌘Cmd key. You will now have a copy of your layer visible in the the layers pallet. Click on “layer 0 copy” in the layers pallet and drag it down so it is below “Layer 0”.
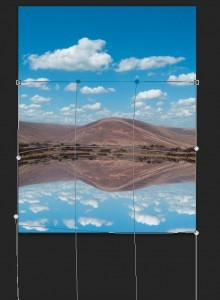
Press ⌘Cmd and T keys to enter transform mode. Click and drag the top of the transition box down towards the bottom of the canvas, or flip the vertical axis, then press the return key. You should now have the following result:
You now need to transform the reflection again, so the edges meet. Go to Edit>Transform>Warp. Distort the reflection layer like this:
Press the return key to set the transformation into place.
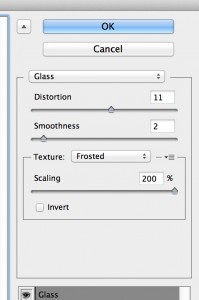
Go to Filter>filter gallery>. Under the “distortion folder select the Glass filter and apply the following settings;
Distortion – 11
Smoothness – 2
Texture – Frosted
Scaling – 200%
Apply motion blur to the reflection. Set the angle to 0 and the distance to about 18 pixels.
Here’s a close up of the reflection:
This is looking good, but there are still a few problems. The cloud reflections in the foreground are too clearly defined and the ripples too small in the foreground area.
To deal with this, make sure the reflection layer is selected and press the ⌘Cmd and J keys to duplicate it. Apply Gaussian Blur with a high setting of about 60 pixels. Click on the layer mask of your duplicate layer and brush out the mountain area with a large soft edged black brush. You don’t need to be too accurate here as sharp clouds just above the horizon line still look good.
Here’s the image now:
The next step is to add ripples to the foreground water. If you do this in two stages you can have a different size for each to give a feeling of perspective.
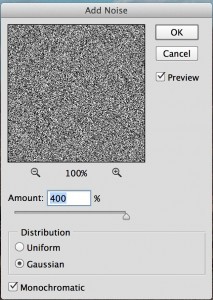
Start with the area of water closest to the reflected horizon. You are going to create a custom texture layer. To do this create a new layer above your reflection layer. The shortcut to create a new layer is Shift+⌘Cmd + N keys. Select “Overlay for the blending options and label the layer something logical like “small water ripples”. Go to Edit>Fill and select “50% grey”. At this point you will not see any change in the image. Next go to Filter>Noise>Add noise and apply the following settings;
Amount – 400%
Distribution – Gaussian
Monochromatic – Ticked.
Apply a small amount of motion blur, with the angle at 0 and amount about 20 pixels (Filter>Blur>Motion Blur).
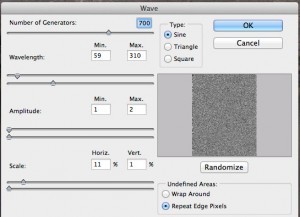
Next go to Filter>Distort>Wave and apply the following settings:
In the top right hand area of your layers pallet click on opacity and take the value down to about 20%, or what looks visually best to you. Apply a layer mask to your texture layer and paint out the ripple effect with a large black brush on the mountain reflection, which has the blurred glass ripple effect on it and from the foreground where you will add larger ripples.
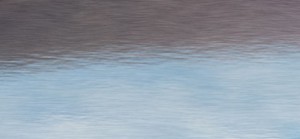
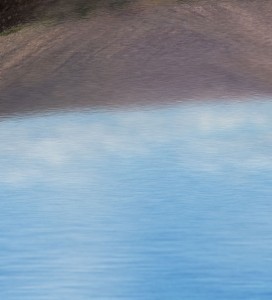
Here’s an enlargement of the reflection.
At the very top you can see the effect of the glass filter with motion blur applied. In the middle is the effect of the overlay texture just described. Note the gradual fading out of the texture ready to apply the larger ripples.
Applying large ripple effect
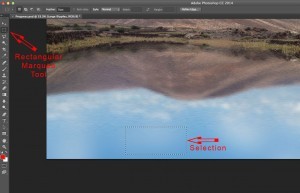
Create a new layer as described above and select overlay again as the blending mode. Make a small selection with the rectangular marquee tool as shown:
Fill the selection with 50% grey as before (Edit>Fill>50% Grey) and apply the same amount of noise as before.
Press ⌘Cmd and T keys to enlarge the overlay area to fill the width of the image. This is how things should look now:
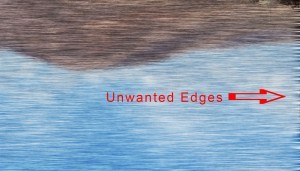
Add motion blur with angle at 0 again, but this time up the amount to about 130. After doing this increase the width of the layer using ⌘Cmd and T keys to hide the unwanted edges.
Apply the wave filter with the same settings as before, lower the opacity to about 25% and use a layer mask to hide the unwanted areas and just leave the foreground area. If you use the linear graduation tool going from black to transparent you will get a pleasing result. Here’s an enlarged area showing the transition of size in the ripples:
Finishing Touches
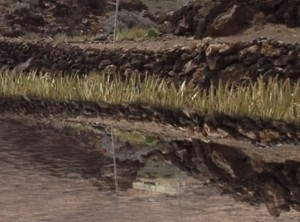
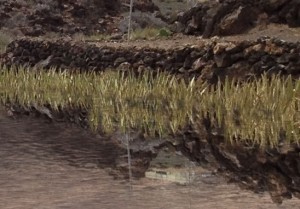
Where a lot of retouching of this kind falls short, is in the reflection of objects close to the water’s edge. Looking at the enlarged section below you can see that the reeds are not reflected in the water:
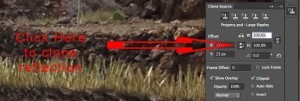
This can be sorted with the clone tool. To clone a mirror image you need to open the “Clone Source” pallet (Window>Clone Source). Click on the area shown to make a downwards mirror image:
If you are on an older version of Photoshop you may not be able to do this. You can enter a height value of -100% instead. You will need to regularly re-select your cloning source to keep things lined up. Once you have finished refining the waters edge you can add a ripple effect using the glass/motion blur method or just leave a clean reflection. Either looks good.
Here’s how it looks with the reeds cloned:
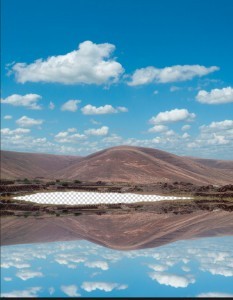
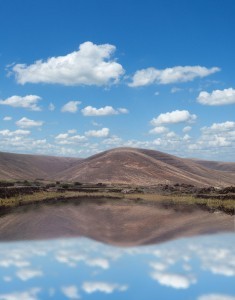
Here’s the finished image again with just a touch of colour enhancement. If you would like to see more detail click on the image to enlarge:



>Its those "I started today in Germany, and now I'm sitting in the Hollywood Bowl, under a starry sky, watchin a corocnt&quet; days that really blow my mind. Modern travel always amazes me.
There are topics to be learned in this post. I will get a lot of work. Thanks for share.