Photoshop Actions
Photoshop Actions: A brief explanation
Photoshop Actions is a way of recording a sequence of tasks in photoshop, which can then be played back at the click of a button. This in itself is a real time saver, but when used in conjunction with Adobe Bridge an action can be applied to any number of images via the image processing tab saving huge amounts of time. Those long repetitive tasks can be set in motion while you have a cup of tea and put your feet up.
Finding the actions Window
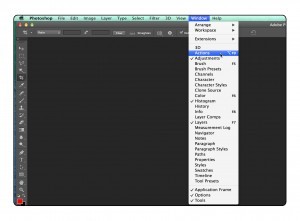
In any version of Photoshop go to the top of the screen and click on Window/Actions. (fig.01)
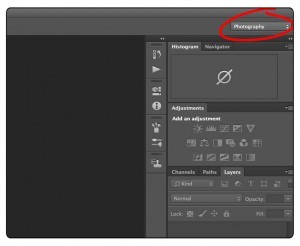
OR In Photoshop cc make sure you’re in the “Photography” Workspace (fig.02)
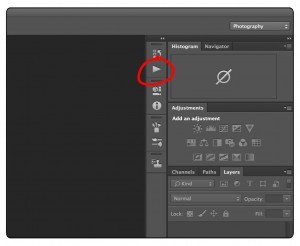
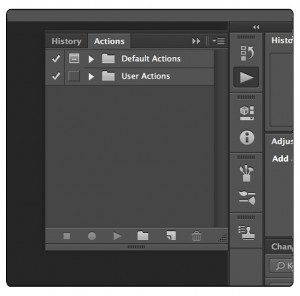
The Actions Window can be found by clicking on the play icon. (fig.03 & 04)
Recording an Action
Looking back to fig.04 you can see that there are 2 folders labelled “Default Actions” and “User Actions”. These are known as “Sets” in the actions window. You can record an action into either of these sets, but for this example I’m going to record into a new set.
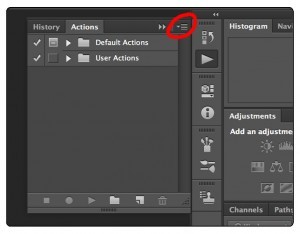
Click in the top right hand side of the Actions window. (fig.05).
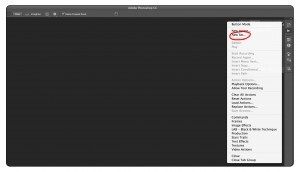
Select “New Set…” (fig.05a)
Type in a relevant name. I’m going to call mine “Contacts” as I’ll eventually set up several actions related to writing contacts.
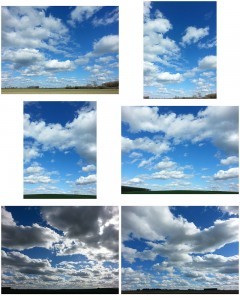
Below is a contact open in Photoshop that I would like to extend the canvas on, add a title to and add copyright details to in the bottom right hand corner.
Click on the top right hand corner of the Actions window again and this time select “New Action…”. Name the action something appropriate. I’ll call mine “Title and Copyright”.
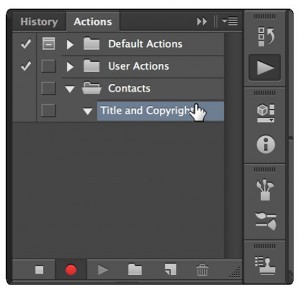
The record button should already be active and the new set and action visible as shown below. (fig.06)
Now to start doing the tasks in photoshop:
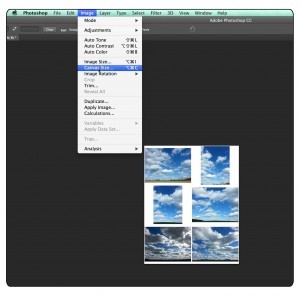
Click on “Image” then “Canvas Size”. (fig.07)
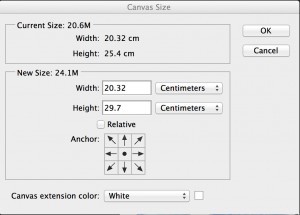
I’m increasing my image size from 25.4cm to 29.7cm so have changed the height accordingly. The width is left unchanged. Also make sure the “Canvas extension color” is set to “White”. This is preferable to selecting “Background color” which by default is white, but may easily change without you realising. (fig.08)
Next type in copyright details on one layer and the title on a separate layer using Photoshop’s Type tool. You can reposition as needed.
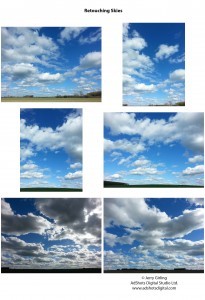
Here’s the finished contact. (fig.09)
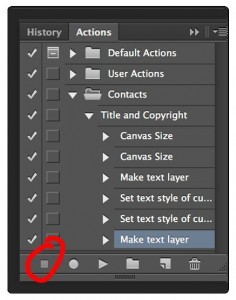
Be sure to press the stop button to stop recording, once you’re happy with the results. (fig.10)
Playing an Action on an open image
This is very simple. Open the image in Photoshop. Press the play button. Assuming all contacts are of the same size, the canvas will be extended, typing applied and positioned exactly as before.
Playing the Action on a batch of images selected in Adobe Bridge
Here’s where the real time saver comes in.
Open up Adobe Bridge and select the images you want to apply the action to: click on the first image, press the shift key, then click on the last image.
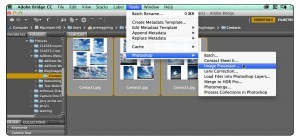
Go to Tools/Photoshop/Image Processor (fig.11)
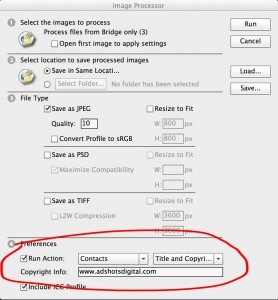
Sections 1-3 are fairly self explanatory. The images will be processed into a folder labelled (JPEG) in the same locations. They will only be saved as jpegs, but you can select multiple file types in section 3.
Section 4 is where you select the “Set” or folder that your Action is in (in this case “Contacts”) and then the action itself (Title and Copyright). Making sure the “Run Action” box is ticked.
In addition to this I have chosen to embed my copyright details in the file, and it is good practice to “Include ICC Profile”.
Here’s the Image Processor window with details filled in, as described above, showing where to find the “Run Action” section. (fig.12)
Click on the “Run Button” in the top right hand of the “Image Processor” window to process the images.
All the original images are kept untouched and the new processed images saved in a folder labelled according to the file type selected.
I hope you have found this useful. Once you get the idea of Actions, you start to come up with all sorts of ideas of when to use them. Any time you find yourself repeating the same task over and over again in Photoshop stop and think if you could do this with an Action.
Next blog I will show you an action which I call “Flat 16”, which will explain how to make adjustments to images without a loss in quality.
As always, any comments or information you would like to share are very welcome.


